
Setting up Single Sign On with Okta
This guide will help you configure Okta Single Sign On for Vivantio ITSM. If you're looking for instructions on setting up Provisioning, please refer to Configuring Okta Provisioning for Vivantio ITSM.Basics
If you're using Okta, you can configure Vivantio's Technician and End User Portals to allow Single Sign On from Okta. Okta supports multiple different protocols for Single Sign On; currently, the following are supported within Vivantio
- OpenID Connect
- SAML
Vivantio does not support the SWA protocol. We recommend customers use OpenID Connect, as it offers a simpler setup experience.
Requirements / Limitations
- Both OpenID Connect and SAML can be used for Single Sign On for Contacts and Technicians. However, the Contacts/Technicians must exist in Vivantio first. You can use the Provisioning feature of Okta to create contacts (but not technicians. Please see Configuring Okta Provisioning for Vivantio ITSM for more details)
- To use OpenID Connect, you will need the 'OpenID Connect' feature enabled
- To use SAML, you will need the 'SAML' feature enabled
- Regardless of protocol, SSO to Vivantio must must be initiated from Vivantio
Step by Step Instructions
OpenID Connect
At the time of writing, Okta does not support publishing OpenID Connect applications in the Okta Integration Network. Instead, you will create a custom application.
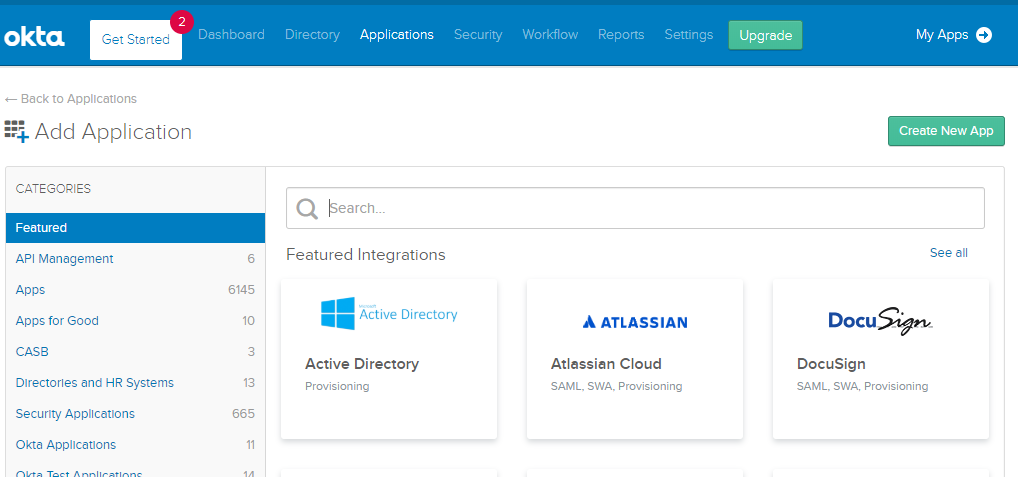
Within the Applications area of Okta, click 'Add Application', and then click the 'Create New App' button in the top right:
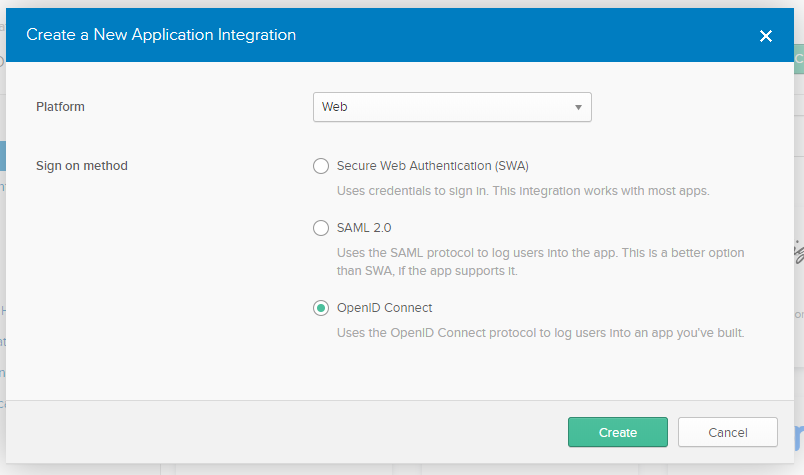
In the dialog that appears, select OpenID Connect (other options can be left at the defaults), and then click Create:
On the next screen, enter a name for your application (this will be displayed to your technicians / end-users, so use something that makes sense!):
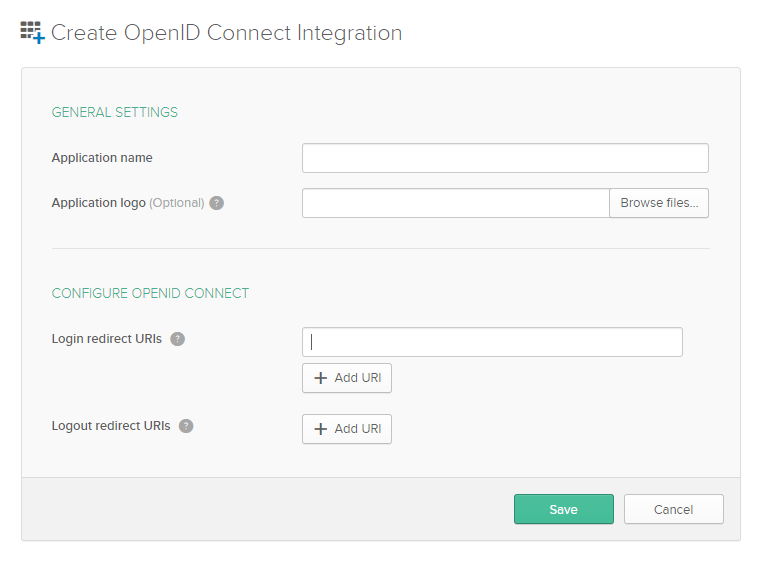
On this screen, you also need to enter your login redirect URI. Copy and paste the below value, depending on which platform your Vivantio is hosted on (please contact support@vivantio.com if you are unsure):
https://sso-okta-az-us.vivantio.com/Account/Complete
https://sso-okta-az-uk.vivantio.com/Account/Complete
https://sso-okta-az-eu.vivantio.com/Account/Complete
https://sso-okta-az-ca.vivantio.com/Account/Complete
Once the redirect has been entered, you will see the following screen:
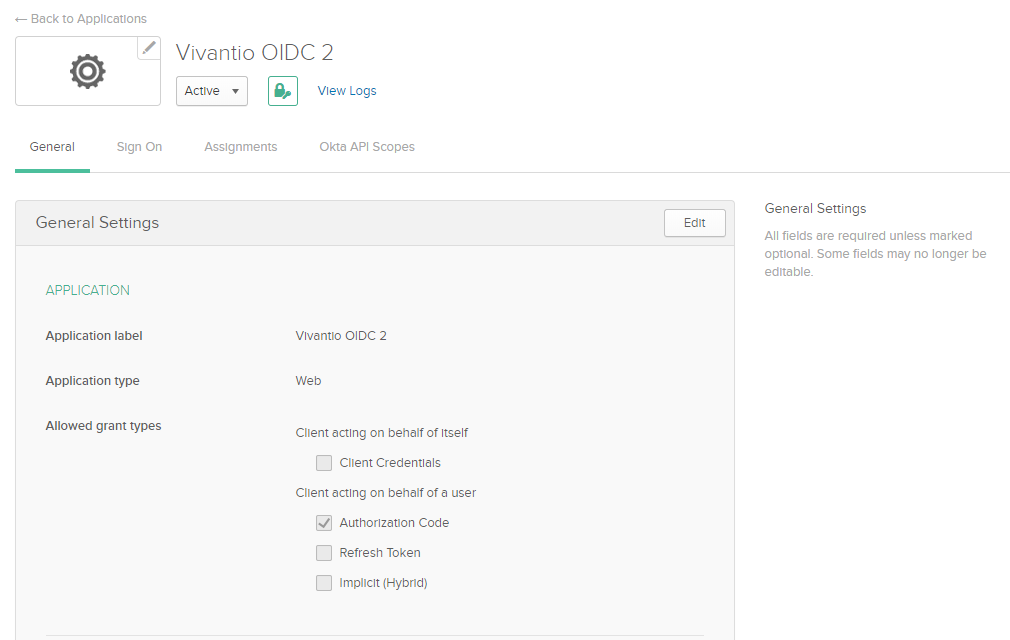
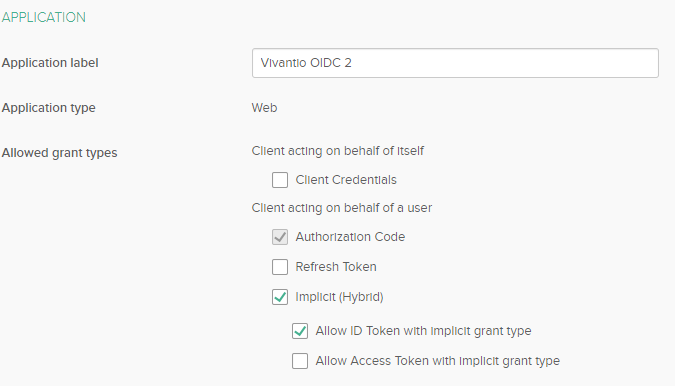
Click the edit button, and then configure the following properties:
- Application
- Allowed grant types: Enable "Implicit (Hybrid)", and ensure that "Allow ID Token with implicit grant type" is checked
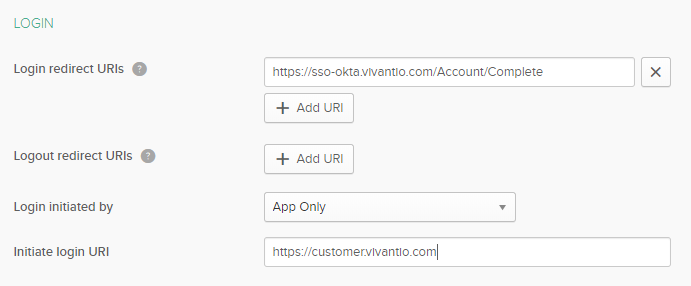
- Login
- Initiate Login URI: Enter the URL of your Technician or Self Service Portal as required
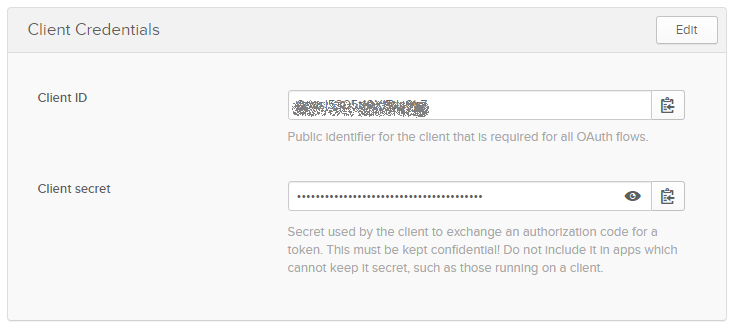
Once you have saved those details scroll down to the Client Credentials section, and take a note of the two values - Client ID, and Client Secret:
Log in to your Vivantio Admin Area, navigate to Admin » Integration » OpenID Connect, and paste the values in to the two fields at the bottom of the screen:
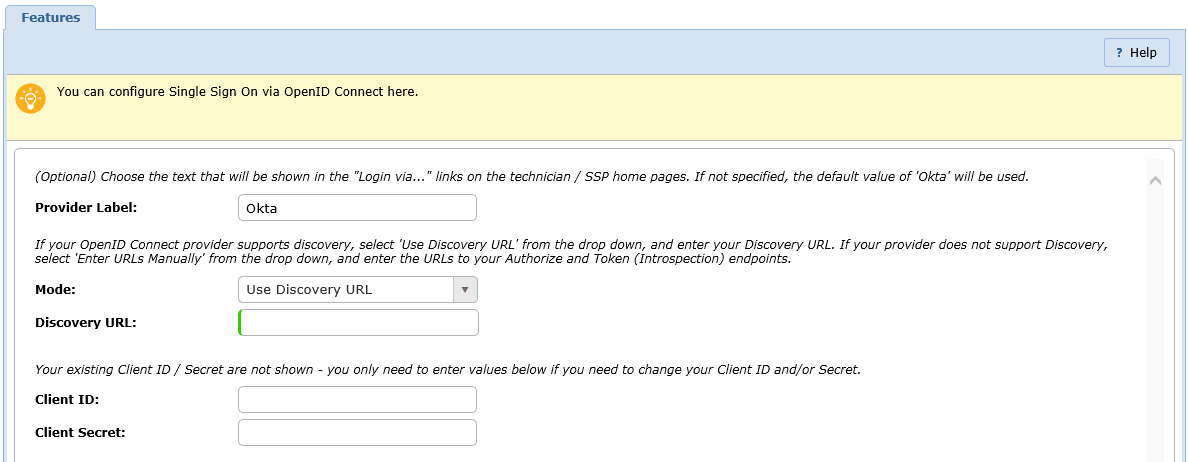
You will also need to enter your Discovery URL. This is typically in the format of:
https://okta-tenant-name.okta.com
For more information on the other fields on this screen, please see our OpenID Connect Documentation.
You're now set up for Single Sign On! Don't forget to assign your newly created application to those users who have access to Vivantio though!