

Overview
Using OpenID Connect for single sign on
OpenID Connect allows you to use any OpenID Connect compatible identity provider to sign in to the Vivantio Technician and End User portals.
To get started, make sure OpenID Connect is enabled, by going to:
Admin > Setup > Global Settings > Features
Then make sure the OpenID Connect box is checked as shown below.
If you do not see the OpenID Connect box, please log a ticket with our support team to request it.
Once OpenID Connect is enabled, you'll see a new option in the left menu:
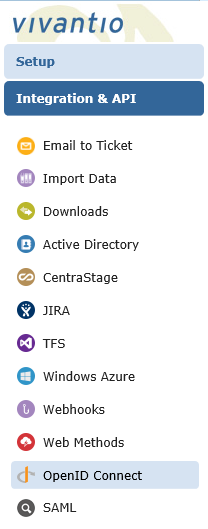
If you don't see the menu item straight away, try refreshing the page.
Selecting that item in the menu will take you to the OpenID Connect settings page:
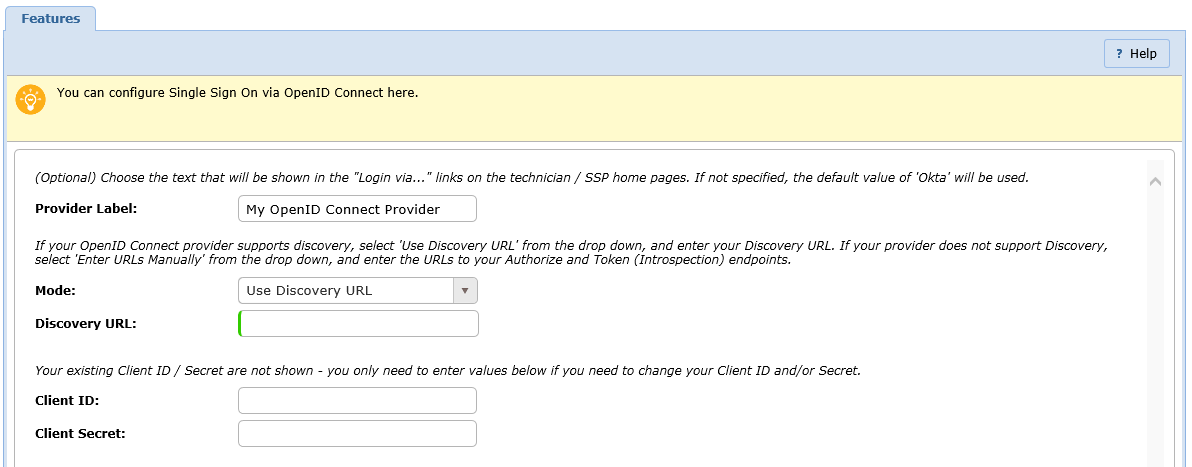
From that page, you can configure the following options:
- Provider Label - the name that will be displayed on the Vivantio login page
- Mode - some providers support automatic discovery of your OIDC endpoints; others require you to manually enter the endpoints individually
- Use Discovery URL - select this option if your provider supports automatic discovery
- Enter URLs Manually - select this option if your provider does not support automatic discovery
- Discovery URL - enter the Discovery URL for your provider (only used if you selected 'Use Discovery URL')
- Authorize Endpoint URL - enter the Authorize Endpoint for your provider (only used if you selected 'Enter URLs Manually')
- Token Endpoint URL - enter the Token Endpoint URL for your provider (only used if you selected 'Enter URLs Manually')
- Client ID - enter your unique Client ID
- Client Secret - enter your Client Secret
The values to use in these fields are all obtained from your OpenID Connect Provider. For some providers, such as Okta, Vivantio can help you find the values. But in most cases, if you're unsure where to get these values from, you will need to contact your provider directly.
Additional Information
Reviewed: 08 March 2023