
Overview
Azure DevOps (ADO) is a set of development tools that helps teams plan, develop and deliver software. It provides integrated features that can be accessed through a web browser.
Further information about integrating Vivantio with ADO is available in the Vivantio Customer Centre via this link https://www.vivantio.com/resources/blog/vivantio-tfs-integration/
Before you set up an integration with ADO you must first ensure it has been enabled in Admin > Setup > Global Settings. Make sure that ADO Integration is selected and Save the changes.
Prerequisites and Basic Configuration
In order to connect Vivantio to ADO, you’re going to need:
- Admin access to your Vivantio instance
- Admin access to your ADO instance
- A user account in ADO for Vivantio
- The IP address(es) for your ADO servers
To set up the integration you will need to go to Admin > Integration & API > ADO.
The first screen you’ll see will prompt you for the version of ADO you’re using, and the credentials to use. If you’re using ADO 2012/13, or 2015, you’ll probably enter a username and password. If you’re using ADO 2017 or VSTS, you’ll probably enter a username and a Personal Access Token
Having entered those and hit Save, the bottom of the screen will update to show a couple of different URLs: the Work Item Alert URL, and the Service Hook URL.
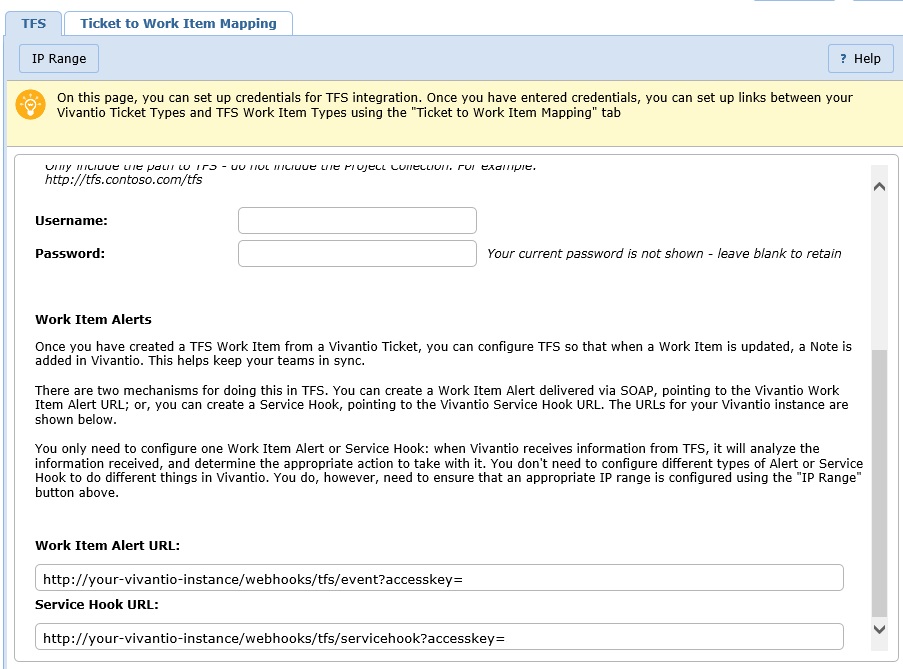
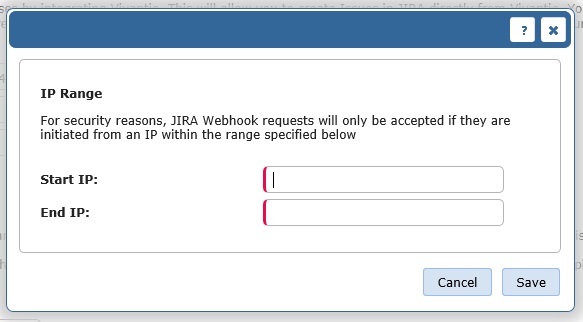
You’ll use one of these URLs when you set ADO up to send information back into Vivantio – more on that later – but while you’re here, you should configure the IP Range for Vivantio to accept requests from, using the IP Range button in the menu bar at the top of the screen.
Having configured those, you can move on to the next tab, Ticket to Work Item Mapping.
Ticket to Work Item Mapping
You can control which types of Vivantio Ticket can be mapped to which types of ADO Work Item by setting up Ticket to Work Item Mappings. This prevents the wrong type of information being transferred / the wrong type of records being created.
Basic Details Tab
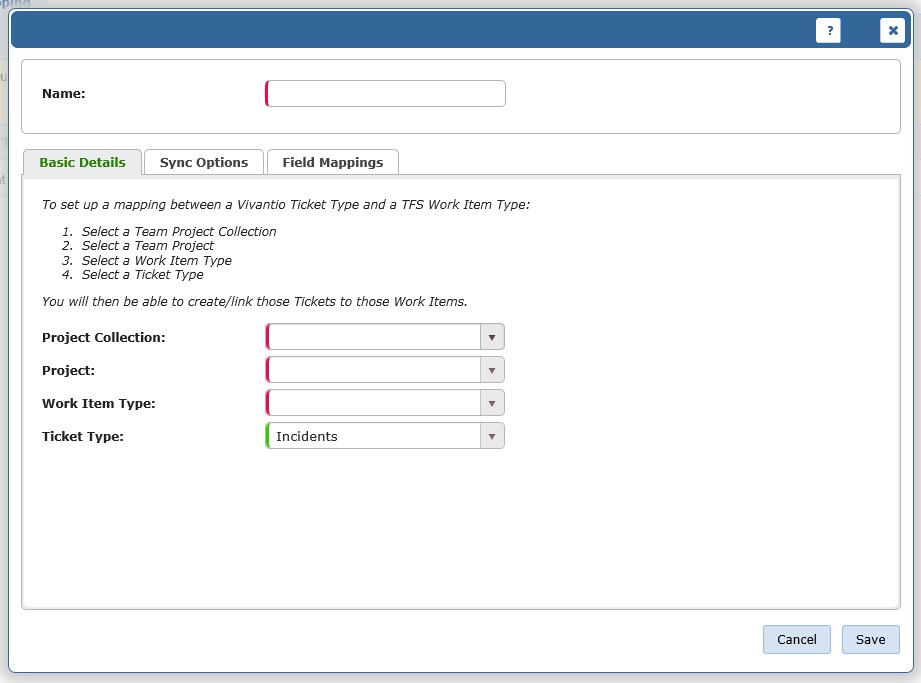
When creating a Ticket to Work Item Mapping, you’ll be prompted for a number of different things:
- Project Collection – The Project Collection in ADO
- Project – The Project in ADO
- Work Item Type – The Work Item Type in ADO
- Ticket Type – The type of Ticket within Vivantio
These control the basics of the mapping.
Sync Options Tab
On the next tab there are settings relating to the sync of data between:
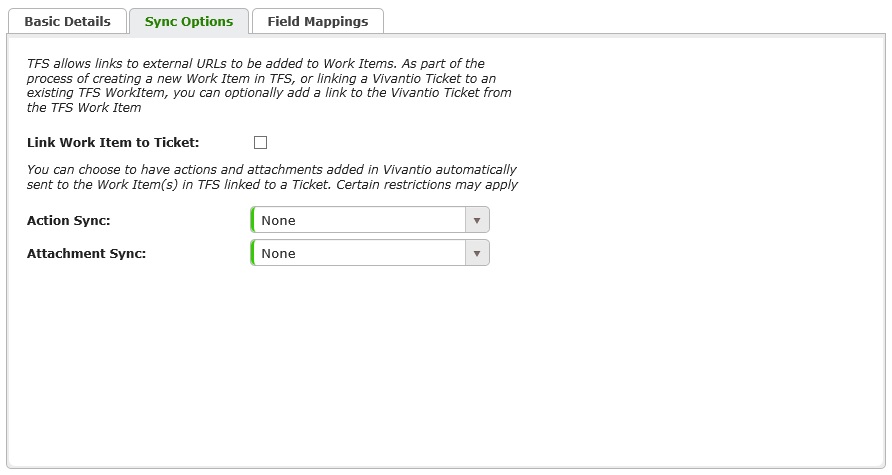
You can configure Vivantio to automatically send updates to ADO when the Vivantio Ticket is updated (this option DOES NOT force ADO to update Vivantio though – that has to be configured within ADO itself).
Field Mapping Tab
Finally, you can add additional field mappings under the final tab:
As standard, Vivantio will populate the Work Item Title and Description; if you don't want the standard mappings you can override them using the target fields below:
| Vivantio field | Target field in TFS (case sensitive) |
| Title | /fields/System.Title |
| Description | /fields/System.Description |
if you want to add additional mappings, e.g. for custom fields, you can do so here. You can also choose to override the default mappings for Title and Description, for example if you would like to bring in more than one field to the title e.g. {{ticket.displayid}}{{ticket.title}} would bring in both the ticket number and the ticket title.
After choosing the appropriate options, hit Save, and you’re ready to start creating ADO Work Items.
Creating a new Work Item
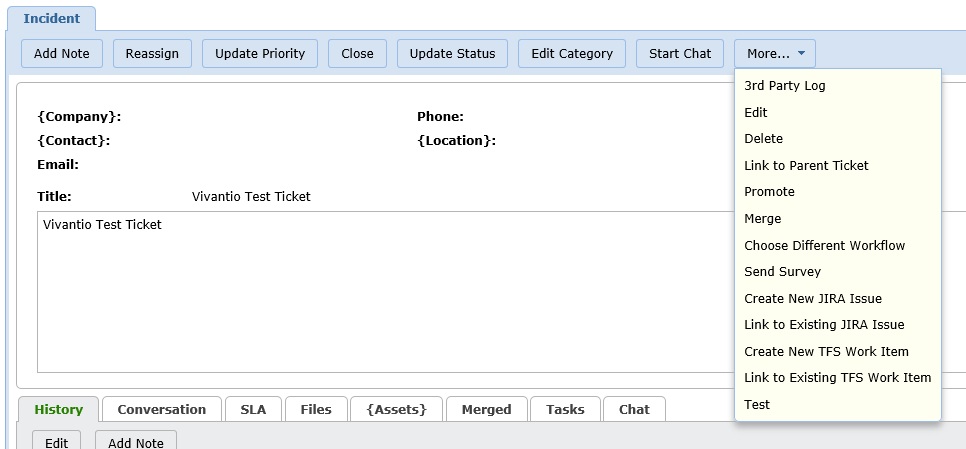
When viewing a Ticket in Vivantio, under the More… menu item, you’ll see the option to Create New ADO Work Item:
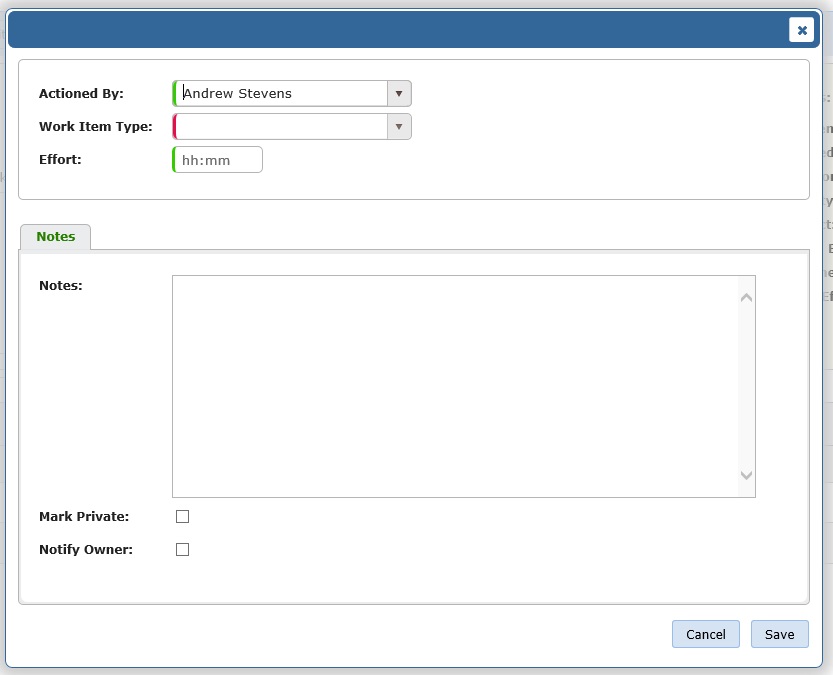
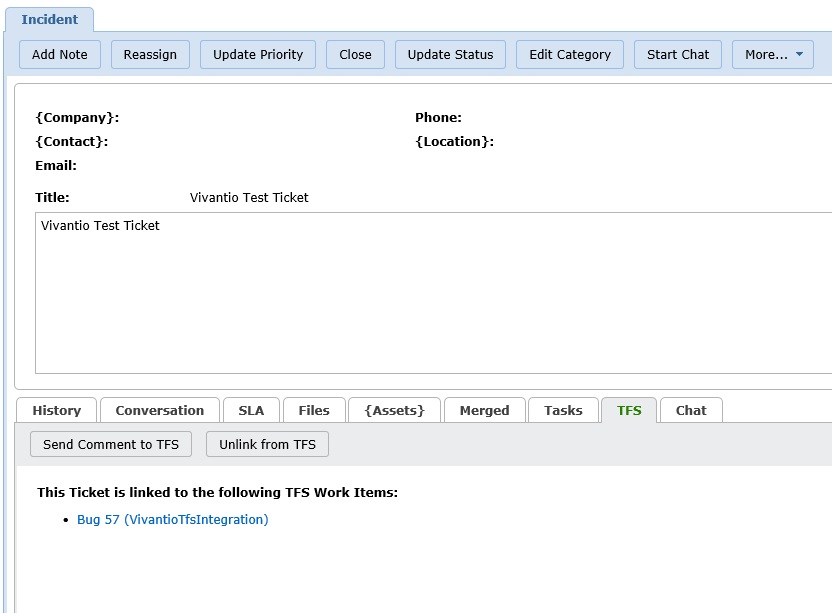
Clicking that button will bring up the Create New ADO Work Item dialog. You can optionally enter Notes for the Vivantio Ticket History, then hit Save to create the ADO Work Item. After a short period of time, you’ll see a ADO tab appear on the Ticket Details. That includes a link to view the Work Item in ADO, along with options to unlink the ticket from ADO, or to add a direct comment to the ADO Work Item – useful if you didn’t choose to automatically sync actions.
Getting Information back from ADO
The next step in the process is getting information added to ADO sent into Vivantio. This is done using one of two mechanisms, depending on what version of ADO you’re using:
- Work Item Alerts (ADO 2015 or earlier)
- Service Hooks (ADO 2017 / VSTS)
The configuration is pretty similar either way.
Creating a Work Item Alert
(The Microsoft documentation on Work Item Alerts can be found here)
Work Item Alerts are the ‘older’ of the two mechanisms that can be used for ADO to update Vivantio – if you’re using a version of ADO that supports Service Hooks, we suggest you use those instead. However, if you do want to use Work Item Alerts, you can do so easily.
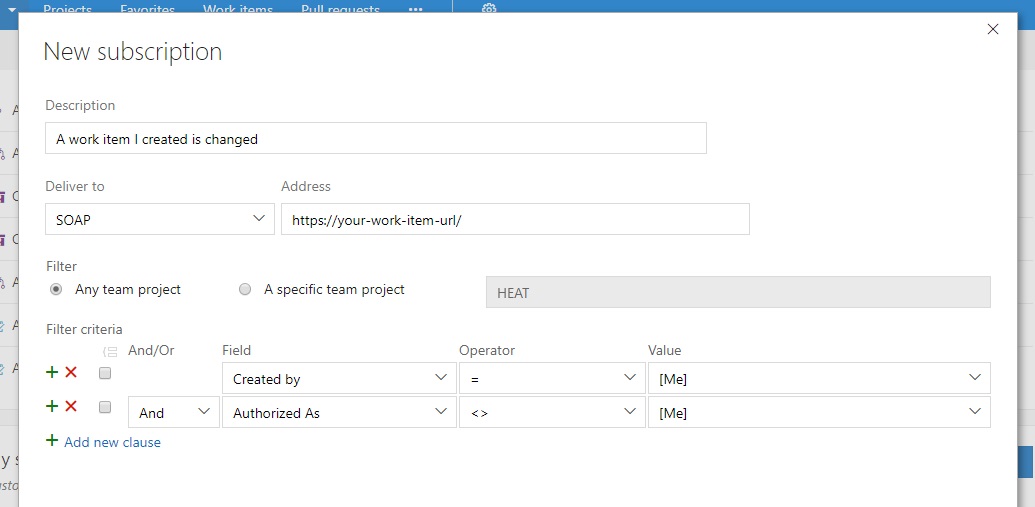
You can follow the instructions in the MS documentation to configure the basics of the Work Item Alert – which work items the alert is for, and when. The main difference is that rather than having the alert delivered to an email address, you’ll select the ‘SOAP’ option, and enter in your Work Item URL:
ADO will then send a HTTP request to Vivantio when the alert fires, and Vivantio will add the details of the update as a Note on the ticket.
Creating a Service Hook
(The Microsoft documentation on Service Hooks can be found here)
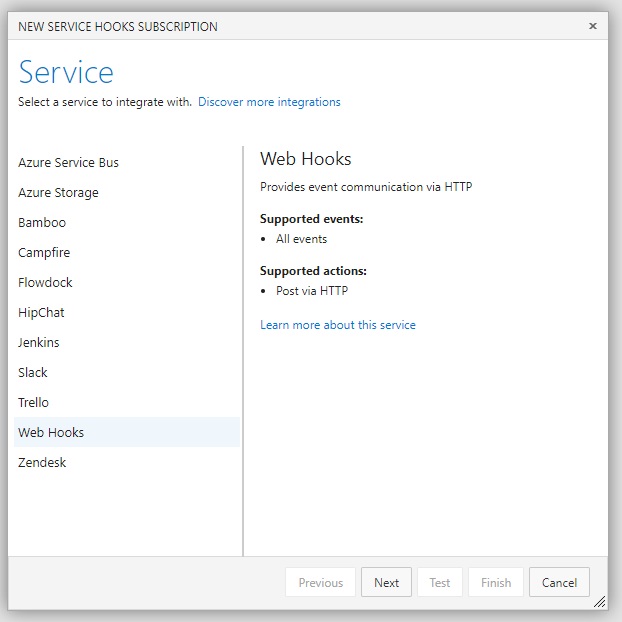
Service Hooks are a newer feature within ADO – introduced in ADO 2015. We don’t currently have Vivantio listed within ADO as a dedicated option, so on the first page of the Create Service Hook wizard, you’ll choose the “Webhooks” option:
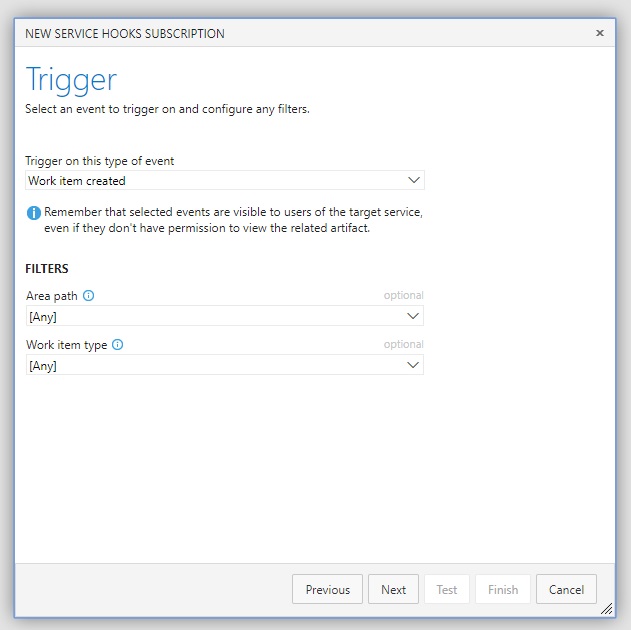
On the next page of the wizard, you’ll choose the type of event the Service Hook triggers on:

Right now, we only support Work Item Commented On and Work Item Updated – but we’re working on introducing support for other events soon. Enter any filters you want for the area or work item type, then move on to the last step:
All you need to do here is add your Service Hook URL, then click Finish. ADO will then start sending updates on Work Items back in to Vivantio.
If you’re using Vivantio and ADO, and you don’t yet have them integrated, give it a try, and see how it can help you improve communications between your Service Desk and your development team!
ADO Trigger Rules
Once an integration with ADO has been established the Trigger Rules can be used to create new ADO Work Items under set conditions.
Admin > System Areas > Configuration > Business Rules > Trigger Rules tab
After selecting the option above you will be presented with the following dialog box
Work Item Type: The drop down list will contain all the items set up in your integration
Reviewed: 07 June 2023