

Overview
JIRA is web based software primarily used for bug, issue tracking, and project management.
The most common applications are:
- Software Bug Tracking / New Feature Development
- Support Helpdesk
- Internal Project Management systems
Vivantio links with JIRA to provide a ticket system which communicates to and from each system.
Please see the Vivantio support portal for more information: https://support.vivantio.com/Article/Detail/1457
Guidance
Navigate to the Admin Area > Integration & API > JIRA
Administration in Vivantio
Jira Credentials
Four pieces of information are required:
- JIRA API Root URL (this must start https)
- Username
- Password
- IP Range
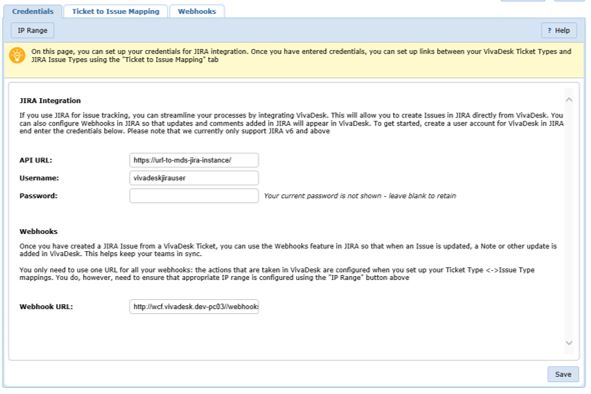
These values are used for Vivantio to interact with the JIRA API. The user should be a JIRA user with permission to create/read issue data of the required types. Depending on your system configuration you may need to use an API access token instead of a password.
These values are also used to control access to the unique Webhook URL generated by Vivantio (JIRA does not allow credentials to be passed with webhook messages, so access is controlled via IP range. All webhook messages received by Vivantio are validated against the originating JIRA instance before being accepted before processing) Once credentials have been entered, the unique Webhook URL is generated; this is used when configuring Webhooks in JIRA.
Ticket to Issue Mapping
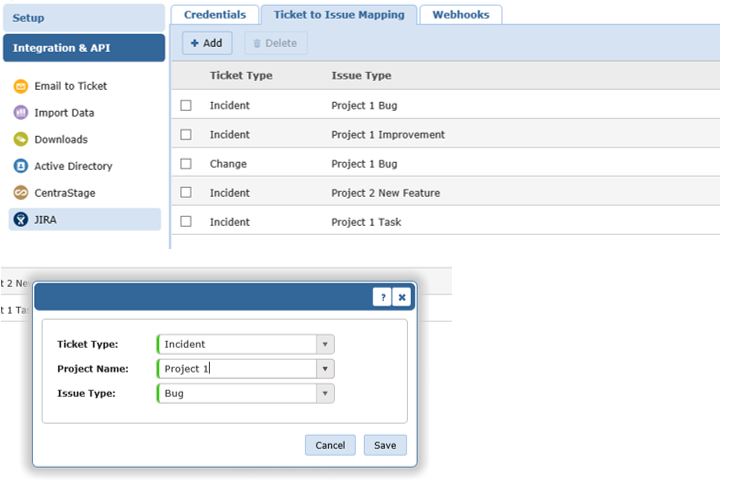
Once credentials have been entered, relationships can be created between Ticket Types in Vivantio and Projects/Issues in JIRA.
When adding a Ticket to Issue mapping, three pieces of information are required:
- Ticket Type within Vivantio
- Project within JIRA
- Issue Type within JIRA
The Projects and Issue Types shown within the dialog are looked up from JIRA, based on the permissions of the current API user. These mappings configure the options available when using the 'Create New JIRA Issue' process within Vivantio.
Webhooks
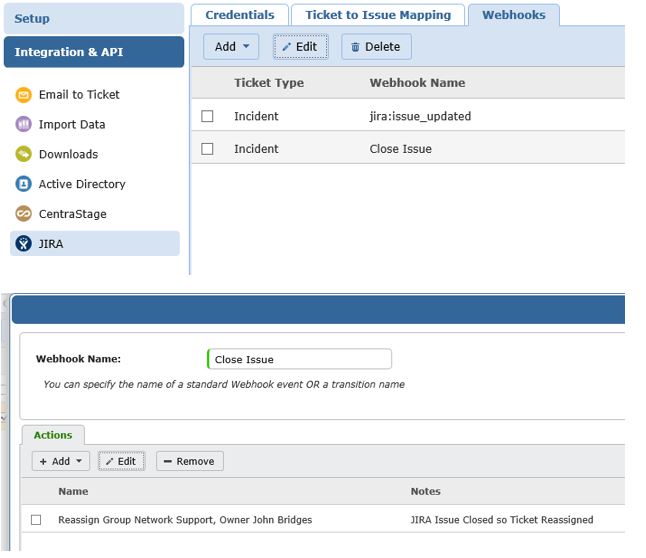
Webhooks are used to configure the actions Vivantio will take when messages are received from JIRA. The configuration of Webhooks within JIRA is covered within the "Administration in JIRA"at the end of this screen.
When adding a Webhook, two things are required:
- The Webhook name; this may be either:
- One of the standard JIRA Webhook names, such as "jira:issue_updated", or
- A Transition name, such as "Close Issue"
- The list of actions to be applied to the relevant Tickets when the Webhook is received. This may include adding notes, changing ticket status/owner, etc
Administration in JIRA
Authentication & API Access
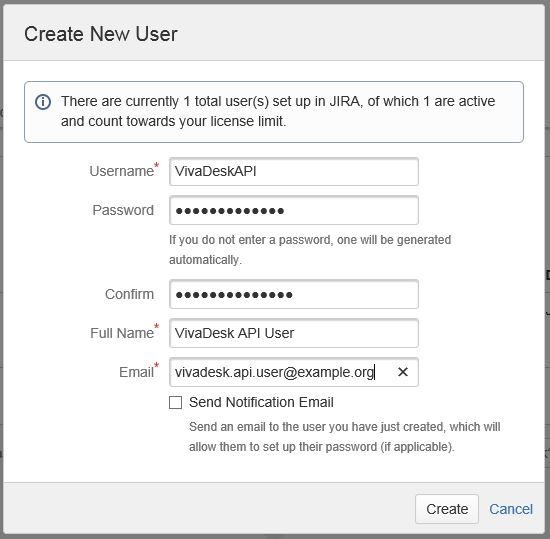
To enable Vivantio to communicate with JIRA, a JIRA user needs to be created with appropriate data permissions as shown in the screen shot to the right:
- API Access needs to be enabled:

Webhook Creation
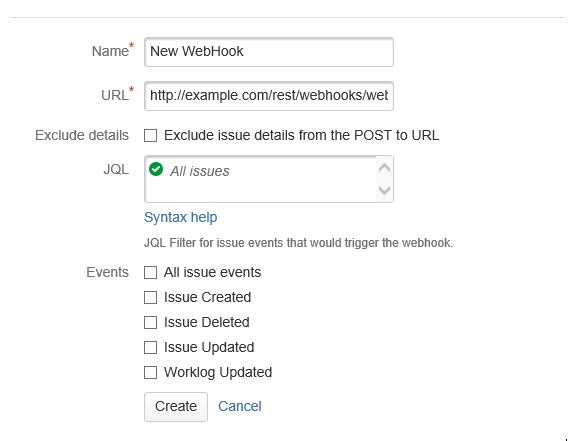
For JIRA to be able to send information back to Vivantio, a Webhook needs to be created. This can be done in the main admin area under Webhooks
The URL for the Webhook can be found in the Vivantio Admin Area on the 'Credentials' tab. The standard events for Webhooks cover a broad range of actions that can be performed within JIRA. To reduce the amount of information passed back to Vivantio, it is recommended that Webhooks be configured for specific Transitions.
Transition Webhooks
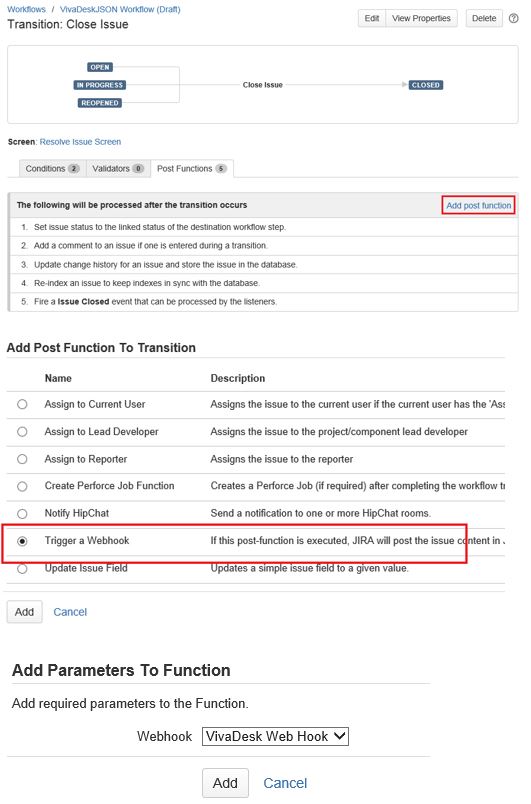
When editing the workflow for an Issue Type, it is possible to add a Post Function to the transition which fires the Webhook. Configuring Webhooks in this way allows fine grained control over which events are sent to Vivantio.
Reviewed: 08 March 2023